This entry is long. Sorry. I've included a table of contents to make navigation easier, and clicking a section heading will bring you back to it.
contents
- contents
- introduction
- getting started
- plugins
- treesitter
- lualine
- completion
- luasnip
- autopairs and tabout
- telescope
- oil
- closing remarks
introduction
Since learning Vim motions, NeoVim (nvim) has quickly become my preferred text editor and IDE. As anyone who has gone down the rabbit hole of vim (or more generally, system) customisation (also termed ricing) knows: the rabbit hole is deep. My nvim config is forever evolving closer to my idea of a perfect development environment, alongside my understanding of my system as a whole.
However I find that I modify my config sporadically in short and intense bursts, mostly when my frustration with a certain feature finally gets the better of me and I decide to 'just do it myself'. Increasingly, this has become unwieldy and difficult to maintain; every time I delve into the dotfiles I have to relearn many things that I have already been through, which is both frustrating and a waste of time. Many 2AMs have come and gone while I re-read documentation instead of fixing what I actually intended to.
This has led me to the (quite rational, I think) decision to to re-write the entire thing from scratch, and document the process for future reference.
getting started
My preferred directory hierarchy for a modular Neovim config looks something like this:
~
|- .config/
    |- nvim/
        |- init.lua
        |- lua/
        |- user/
            |- init.lua
            |- plugin_1.lua
            |- plugin_2.lua
            :
            |- plugin_n.lua
This allows us to do several handy things. Firstly, we can localise our
config for each plugin in plugin.lua files, which makes everything
much more maintainable. Secondly, we can create multiple user profiles
that have different configurations, and we can swap between them by
simply changing the directory that we source in the first init.lua.
This is neat, as it provides lots of scope for experimentation (you
could create forks of your user config to safely try new things!), and
anybody with this hierarchy can simply pull somebody else's profile.
first steps
To start, we need to replicate the file tree above (not including the
package.lua files, just make the two init.luas for now). We then
want to populate the first init.lua like this:
require('user')
This just tells nvim which 'profile' to use; this is what you would change to swap between different configs, as all config files are contained within the required() directory.
I'll call my user profile core from this point onward, but it could be anything.
The most important things (in my opinion) to start with are keymaps
and options.
They do not require a plugin manager to setup and will make building the rest of our config much smoother.
To do this, we need keymaps.lua and options.lua in the core user
directory.
keymaps
The most important key to bind for this section is the leader key, which we define in the core/init.lua file.
Your leader key acts a signal key that activates a second layer of keybinds in Normal mode, and can be used to make an effectively unlimited amount of key chords for whatever your heart may desire.
To define the leader key, we put this in the second init.lua file:
vim.g.mapleader = " "
I use the spacebar (" ") as my leader key, as it is very easily reachable and has no critical function in normal mode (it jumps the cursor forward similar to l, but it also traverses line breaks).
Note that whichever key is mapped to the leader key will have a delay (of a defineable length, which we will see later) on its usual function while nvim waits for further inputs to activate chord mappings, but will still enact the primary function after this delay.
There is also the option to maplocalleader, which can be used to define keymaps for only the open buffer, which allows for filetype specific mappings (!)
Now to add some proper keybinds in the keymaps.lua file.
A keymap in vim usually has the format of:
vim.keymap.set(mode, key, command, opts)
Which is not very long but I don't like typing it over and over (and, often, we don't need the opts arg) so we can create a lua function to make it shorter:
-- shorten keymap function
local function keymap(mode, key, command, opts)
    opts = opts or {}
    vim.keymap.set(mode, key, command, opts)
end
This just sets the function keymap() to take the same paramaters as vim.keymap.set(), and adds the condition that the opts argument can be omitted (by accepting an empty lua table). Nice!
Following this, we can start defining keymaps with the keymap()
function. Let's start with a simple example:
keymap('i', '<C-c>', '<Esc>') -- lol
We start by calling keymap().
All arguments are strings, passed with single quotations.
The first argument is the mode(s) that the keymap should be active in; i for insert, n for normal, v for visual, etc.
The second argument is the key(s) we want to map.
The < and > indicate a special keycode instead of literal keypresses; passing Esc would be interpreted as pressing uppercase E, lowercase s and
lowercase c as a key chord, while <Esc> means the actual escape key.
To use pre-existing keychords, we use both < > and a hyphen: <C-c> signifies Ctrl + c.
This keybind, then, takes the key chord Ctrl + c in insert mode and
executes Esc.
The astute may notice that this is, frankly, a rather silly keybind to have, as both Ctrl + c and Esc have the effect of returning to normal mode when pressed.
The reason I have this is to do with using snippets, which we will get to later – it's just because <C-c> and <Esc> have subtly different behaviours, which results in some escape actions not being activated properly when the former is used to complete them (also, my Caps Lock is an additional Control, which I find I find easier to reach than Escape).
Now we have the basics down, we can go crazy with it.
What follows is my keymaps.lua file, in several sections, with most keymaps commented with explanation.
my keymaps.lua file
Some fundamental keybinds, like the previous = example, and essential functions like saving, sourcing, and quitting files:
 -- shorten keymap function
local function keymap(mode, key, command, opts)
  opts = opts or {}
  vim.keymap.set(mode, key, command, opts)
end

-- documentation:
-- https://vimhelp.org/vim_faq.txt.html#faq-20.5

-- SYSTEM

keymap('i', '<C-c>', '<Esc>') -- I CAN EXPLAIN

keymap('n', '<leader>w', '<C-w>') -- remap window navigation before i remap <C-w>
keymap('n', '<C-w>', ':w<cr>') -- saving
keymap('n', '<C-s>', ':so<cr>') -- sourcing
keymap('n', '<C-q>', ':q<cr>') -- quitting
keymap('n', '<leader>c', vim.cmd.nohlsearch) -- clear search highlighting
Motion remaps, such as j/k, being able to move highlighted text with
J and K, and some other preferences of mine:
-- MOTIONS

keymap('i', '', '') -- control backspace deletes entire word

-- allow j / k to move within lines for multiline text
-- while retaining counted relative motions

keymap('n', 'j', function ()
  return vim.v.count > 0 and 'j' or 'gj'
end, { expr = true })

keymap('n', 'k', function ()
  return vim.v.count > 0 and 'k' or 'gk'
end, { expr = true })

keymap('v', 'J', ":m '>+1<CR>gv=gv") -- visual mode text shifting
keymap('v', 'K', ":m '<-2<CR>gv=gv") -- using J / K (down, up)

keymap('n', '', 'o') -- enter to newline in insert
keymap('n', '', 'O') -- shift + enter to newline above in insert

keymap('n', 'o', 'o<Esc>') -- preference for o / O (escapes after motioning)
keymap('n', 'O', 'O<Esc>')

keymap('n', '<C-d>', '<C-d>zz') -- cursor remains centered in <C-d> / <C-u>
keymap('n', '<C-u>', '<C-u>zz')

keymap('n', '<C-j>', '<C-e>') -- scroll screen without cursor
keymap('n', '<C-k>', '<C-y>')
The j/k remaps define simple lua functions, checking whether or not there is a count before the motion.
If there is not (ie. plain vertical navigation) then they'll navigate through each display line in multiline (broken) text.
If there is a count, it will only traverse true line numbers.
This means that it's easy to navigate vertically within broken lines, but relative line numbers are still accurate for counted motion.
They are lua translations of u/monkoose's vimscript solution to this problem.
Quality of life mappings for common manipulations, like indenting =,
yanking entire lines Y, etc:
-- QOL

keymap('n', '=', 'V=') -- easier indenting
keymap('n', 'Y', 'Vy') -- easier line yanking

keymap('n', '<C-n>', 'a<Enter><Esc>k$') -- <C-n> to break line at cursor

keymap('n', '<C-a>', 'A;<C-c>') -- appending ; to current line in normal / insert mode
keymap('i', '<C-a>', '<C-c>A;<C-c>')
And that's all! For inbuilt nvim keys, at least - we will add more when we start adding plugins.
options
Vim options are the preferences that change fundamental behaviours of neovim. They set things like indenting, search query matching, and auto-saving behaviours.
To set preferences, we edit options.lua with
vim.opt.<optionname> = <value>
To find options that we might like to set, we can refer to the :help page or the NeoVim documentation, both of which contain the same information.
Here are my preferences, again broken down by area.
my options.lua file
System options, like the chord input delay mentioned above, swap file behaviour, and mouse behaviour:
-- system

vim.opt.timeoutlen = 300 -- delay for key chord inputs (eg. after leader is pressed)
vim.opt.filetype = "on" -- detects filetype

-- saving / edit history

vim.opt.undofile = true -- whether nvim should save an undotree file
vim.opt.updatetime = 250 -- time (ms) without an edit for a swap file to be written

-- navigation

vim.opt.mouse = '' -- disable mouse ("learn thy motions!")
vim.opt.scrolloff = 8 -- forces 8 row buffer between cursor and screen bounds
vim.opt.mousescroll = 'ver:10' -- increase scroll event sensitivity
Indenting and (relative) line numbers:
-- line numbers

vim.opt.number = true -- line numbers
vim.opt.relativenumber = true -- relative line numbers (i like both)

vim.opt.numberwidth = 2 -- 2 char width
vim.opt.signcolumn = "yes" -- adds padding to line numbers
vim.opt.statuscolumn = '%{v:relnum?v:relnum:v:lnum}' -- left aligns line numbers

vim.opt.cursorline = true -- highlights current line
vim.opt.cursorlineopt = 'number' -- only highlights number, not line

-- indenting

vim.opt.tabstop = 4 -- tab = 4 spaces (when writing a file)
vim.opt.softtabstop = 4 -- tab = 4 spaces (when performing editor commands)
vim.opt.shiftwidth = 2 -- width in spaces of shifting (<<, >>)
vim.opt.expandtab = true -- converts tabs to spaces

vim.opt.autoindent = true -- auto indent lines following an indented line
vim.opt.smartindent = true -- makes autodindent smarter (idk how lol)

-- line wrapping

vim.opt.wrap = true -- allows line wrapping
vim.opt.linebreak = true -- only breaks a line on a word boundary
vim.opt.showbreak = "" -- text inserted before broken lines

vim.opt.breakindent = true -- indented multi-lines retain indenting on broken text
Other text actions, like searching, completion menus (this won't work until we have a completion plugin), and spell checking:
-- searching

vim.opt.hlsearch = true -- highlight on search
vim.opt.incsearch = true -- live search highlighting updates

vim.opt.ignorecase = true -- case-insensitive searching (override with C)
vim.opt.smartcase = true -- also override with capitalised query

-- completion

vim.opt.completeopt = 'menuone,noselect' -- will show completion menu if there is at least one completion option, and will not select an option by default

-- spell check

vim.opt.spelllang = 'en_au' -- australian spelling (en_au, en_gb, en_us)
vim.opt.spell = false -- no spellcheck by default (use ':set spell' and ':set nospell' to toggle on the fly)
And finally some small aesthetic tweaks for cursors and text concealment:
-- aesthetics

vim.opt.guicursor = "r-c-v-sm:block,i-ci-ve:ver25,n-cr-o:hor10"
vim.opt.conceallevel = 0 -- level of syntax replacement, for example math symbol macros being replaced with the actual symbol unicode in a .tex file
Again, we will add some more once we have plugins, but these are the ones that I like for core nvim functionality.
plugins
This is the exciting bit. Plugins are very powerful, and there are so many of them (like, an absurd amount. Just take a look at some ready-to-use neovim configs, like the popular NvChad). A large part of my wanting to write this page was that I didn't even know what some of my plugins did any more; I just added them, and they didn't do anything… bad? So I just kept them. I would like to categorically document which plugins I have, and why I have them.
Before we do that, though, we need a way of organising our plugins. We
do this with a plugin manager. My preference is lazy.nvim, as it
allows for lazy-loading plugins (only loading them when they are needed
to reduce startup impact), automatic installation after adding plugins
to our config, and it uses lua, which matches the rest of our config.
From what I have heard and read, though, it doesn't really matter too
much.
installing lazy.nvim
The process for installing lazy is pretty much the same as setting up
the keymaps and options files: we make the lazy.lua file in the
profile directory and require() the file in our init.lua:
require("core/lazy")
Following the documentation (like good software users), we add the following to the lazy.lua file:
-- installing lazy.nvim (plugin manager)

local lazypath = vim.fn.stdpath("data") .. "/lazy/lazy.nvim"
if not (vim.uv or vim.loop).fs_stat(lazypath) then
  local lazyrepo = "https://github.com/folke/lazy.nvim.git"
  local out = vim.fn.system({ "git", "clone", "--filter=blob:none", "--branch=stable", lazyrepo, lazypath })
  if vim.v.shell_error ~= 0 then
    vim.api.nvim_echo({
      { "Failed to clone lazy.nvim:n", "ErrorMsg" },
      { out, "WarningMsg" },
      { "nPress any key to exit..." },
    }, true, {})
    vim.fn.getchar()
    os.exit(1)
  end
end

vim.opt.rtp:prepend(lazypath)

require("lazy").setup({
-- our plugins go here!
})
We can then add all of our plugin setup in the .setup() function, and
the plugin manager will handle the rest! If we restart nvim, we should
have access to the :Lazy command, which will bring up a buffer showing
all of the currently loaded and installed plugins, of which there will
be none just yet. Let's change that.
installing plugins
I must admit I am getting rather sick of the default neovim colors:
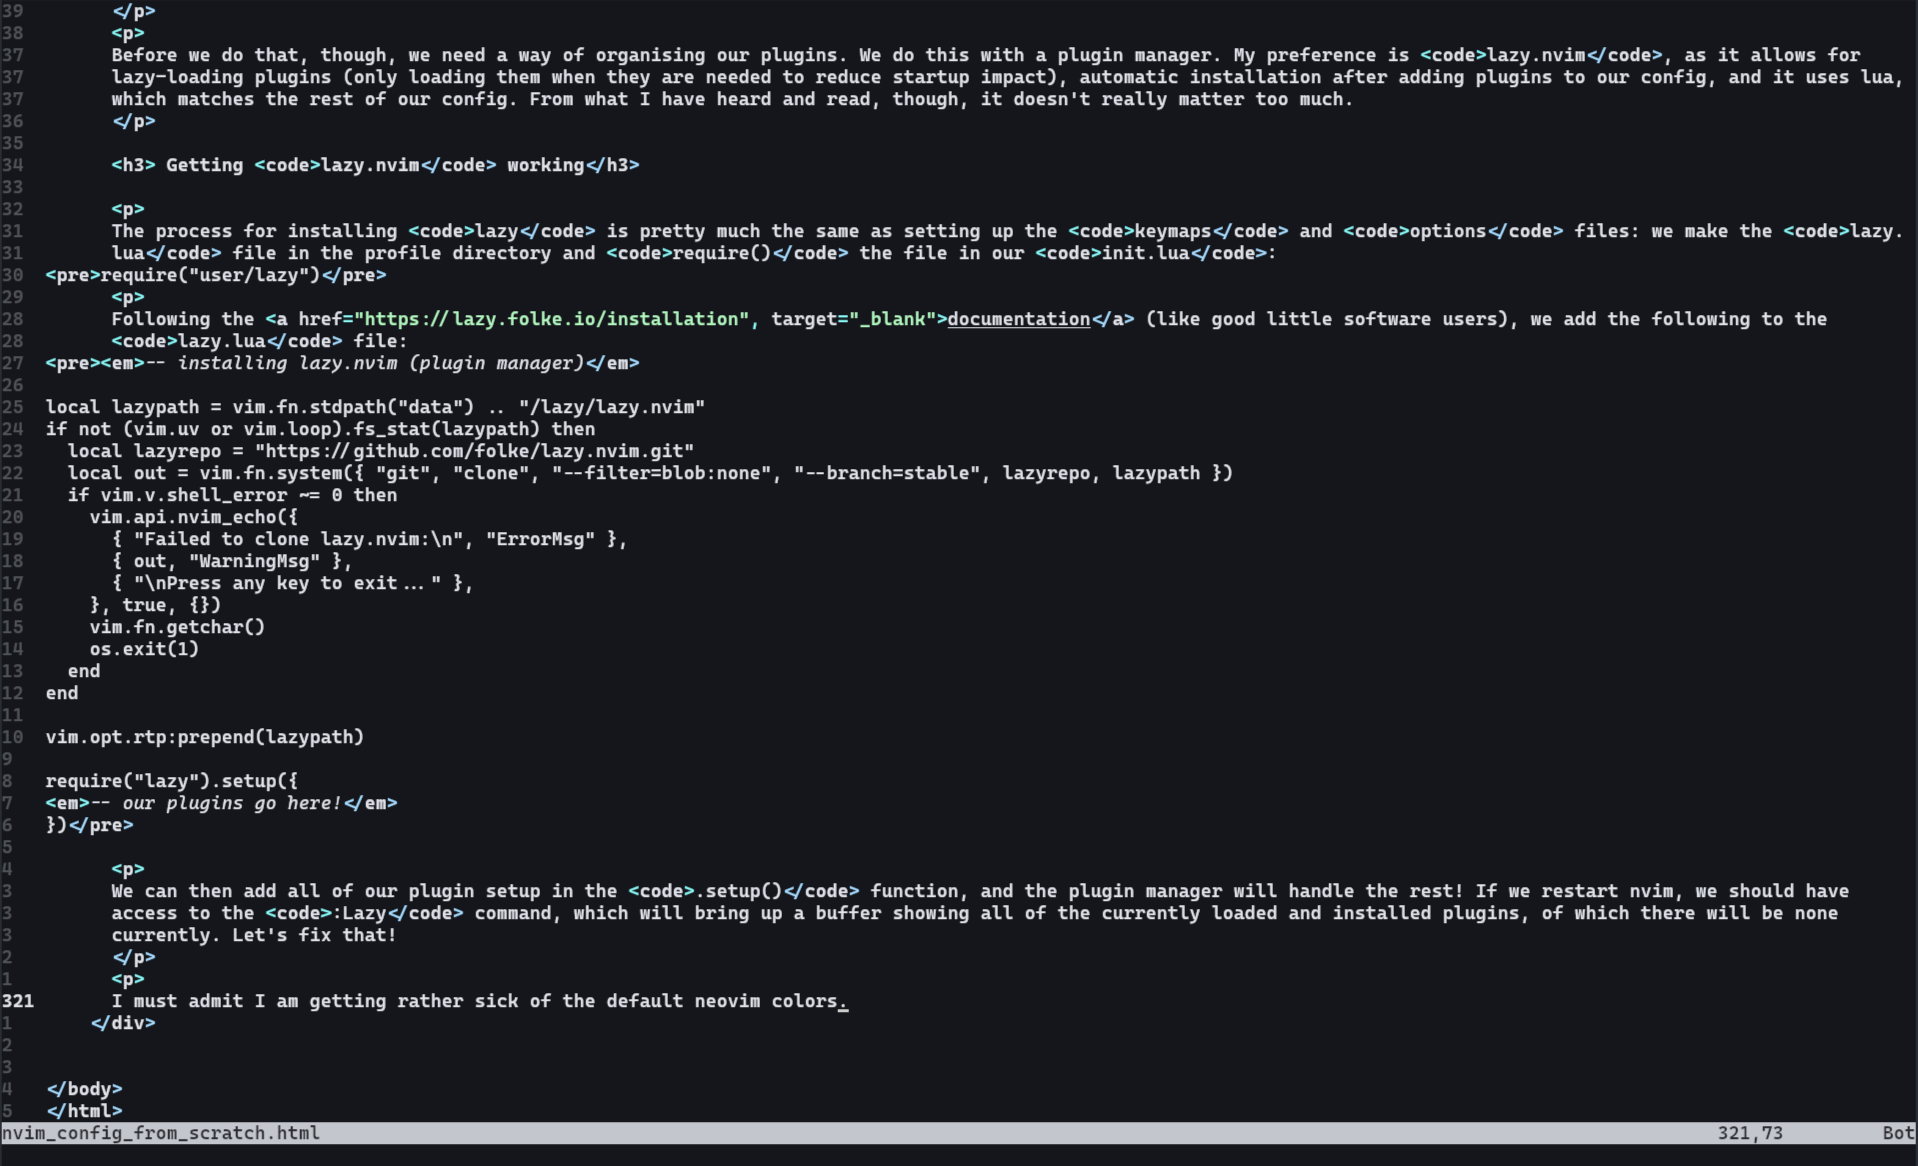
It's high time we address this.
I use the same theme, OneDark, for my entire system (including the
website!) at the minute. Conveniently, there is a plugin for this.
We can install it by starting a new block (scope) in the .setup()
function using {} and writing the name of the plugin (as a git repo),
as well as any configuration or dependencies it needs, like this:
require("lazy").setup({

  -- aesthetics

  {
    'navarasu/onedark.nvim',
    priority = 1000,
    config = function()
      vim.cmd.colorscheme 'onedark'
    end,
  },

})
We can resource the config by restarting neovim, and just like that:
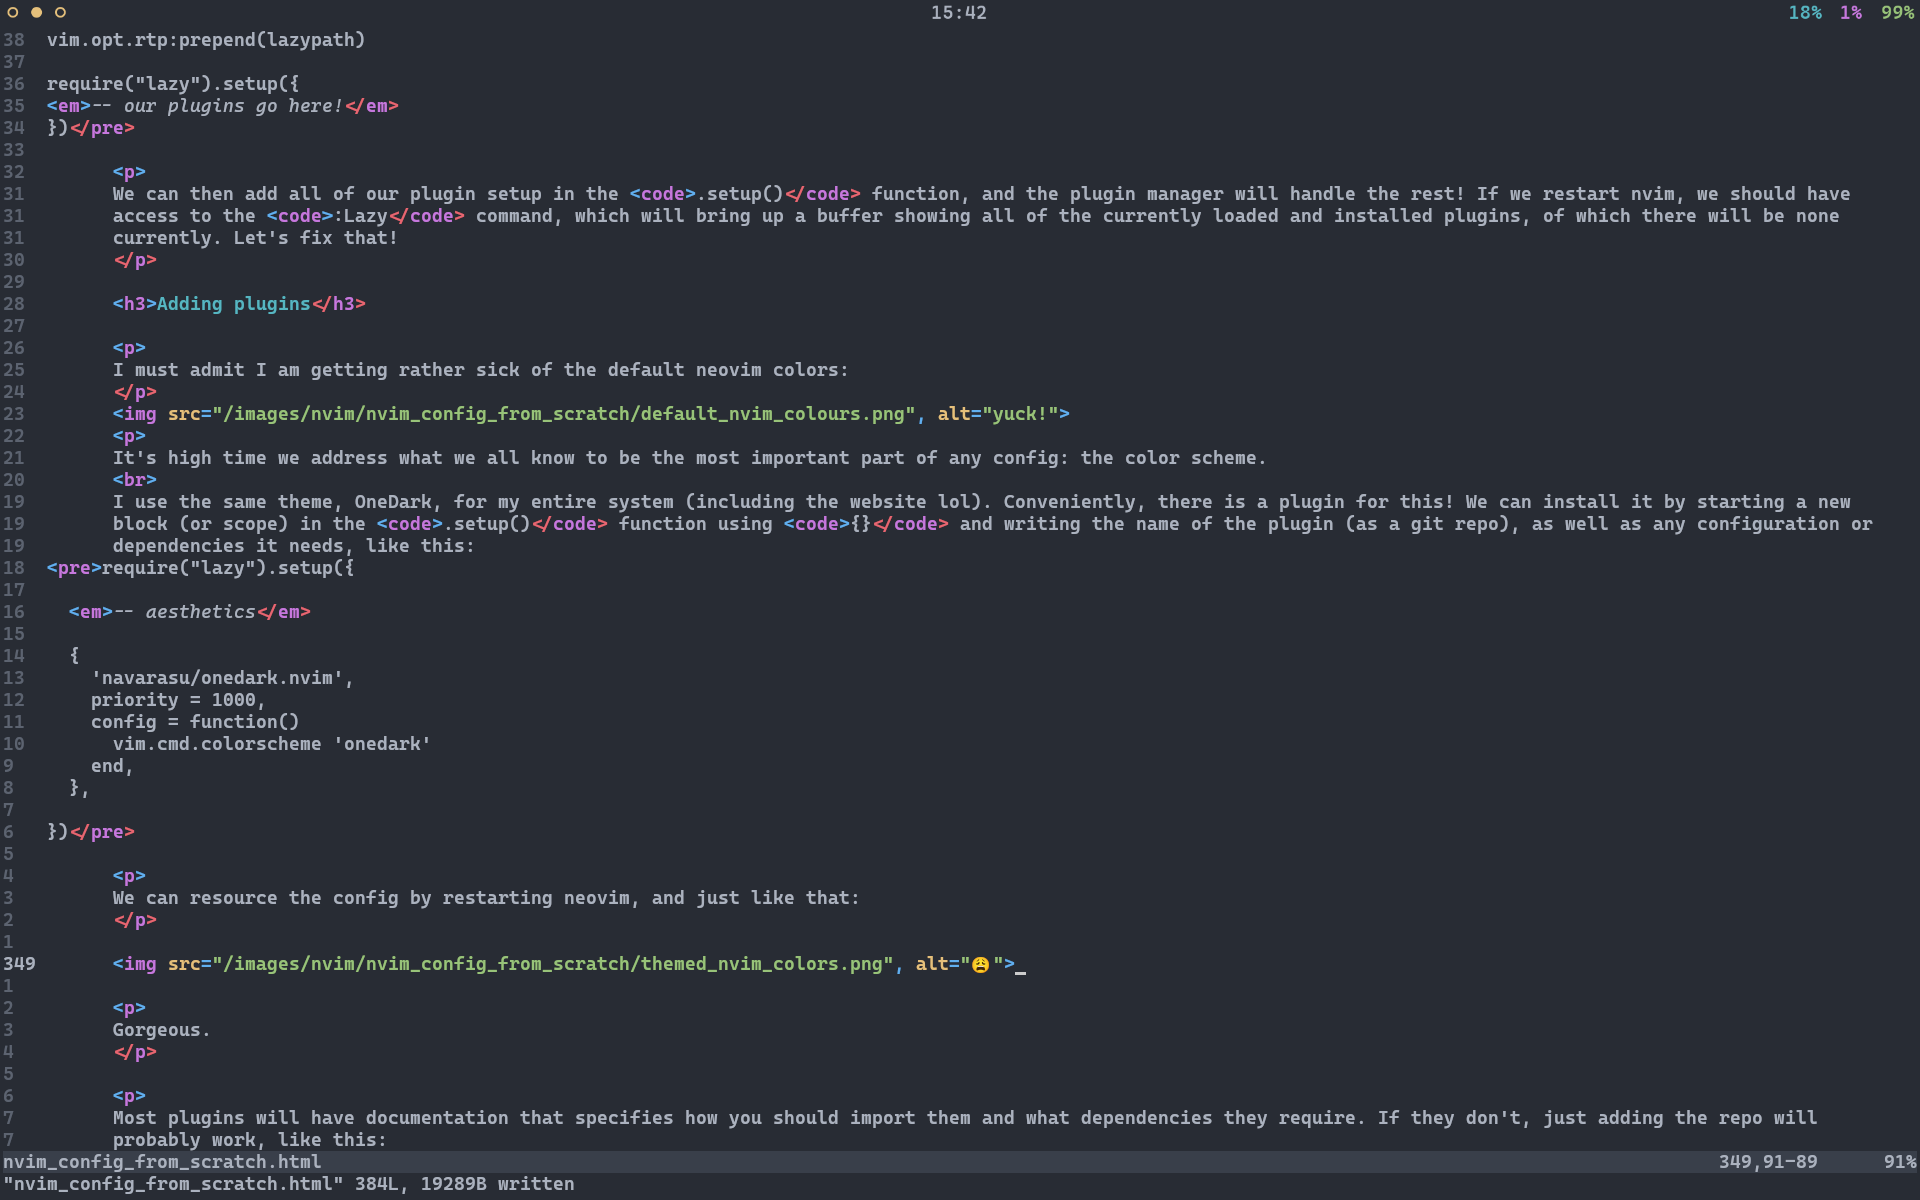
Gorgeous. Most plugins will have documentation that specifies how you should import them and what dependencies they require. If they don't, just adding the repo will probably work, like this:
require("lazy").setup({

  -- aesthetics

  {
    'navarasu/onedark.nvim',
    priority = 1000,
    config = function()
      vim.cmd.colorscheme 'onedark'
    end,
  },

  'nvim-tree/nvim-web-devicons', -- we just use the repo name here

})
Devicons adds support for system icons, like folders, files, images, etc. which will be handy when we add some file navigation plugins.
treesitter
On the topic of aesthetics, treesitter is a lovely addition; it creates incremental syntax trees for a text file, producing very accurate and readable code highlighting. Not strictly necessary, but we could make that argument ad absurdum and end up using Notepad instead.
We add treesitter to lazy.lua:
-- treesitter (syntax highlighter)
  {
    'nvim-treesitter/nvim-treesitter',
    build = ':TSUpdate',
  },
To pass options to the plugin, we can add a treesitter.lua to our
core/ directory and require it in init.lua:
require("core/treesitter")

-- treesitter.lua
vim.defer_fn(function()
  require('nvim-treesitter.configs').setup {

    -- languages treesitter should definitely have installed
    ensure_installed = {'c', 'cpp', 'cmake', 'lua', 'python', 'r', 'rust', 'vimdoc', 'vim', 'bash', 'java', 'latex', 'query', 'html', 'markdown'},

    auto_install = true, -- auto-install missing buffers (set false if tree-sitter is not locally installed)
    sync_install = false, -- install ensure_installed synchronously
    ignore_install = {}, -- parsers to ignore

    modules = {
      highlight = {
        enable = true,
        disable = {}, -- parsers to disable highlighting for
      },
      indent = { enable = true },

      -- syntax-tree based incremental scope selection
      incremental_selection = {
        enable = true,
        keymaps = {
          init_selection = '', -- self explanatory <3
          node_incremental = '', -- no longer self explanatory <3
          scope_incremental = '', -- (i don't know what these do yet)
          node_decremental = '',
        },
      },
    },

  }
end, 0)
lualine
Nvim's default status line is perfectly functional but we can make it much more useful (and pretty!) with the Lualine plugin. This one is fairly straightforward:
-- set lualine as statusline

{
    'nvim-lualine/lualine.nvim',
        opts = {
            options = {
                icons_enabled = false,
                theme = 'onedark',
                component_separators = '|',
                section_separators = '',
            },
        },
},

Lovely stuff.
completion
I have a complicated relationship with completion plugins. On the one hand - fantastic! Completion suggestions make writing boilerplate code so much easier, and having all your variable names at the tip of your cursor is great for avoiding or catching silly syntax errors. On the other hand, why are you suggesting a function from a library I that is not imported in this buffer and then automatically replacing something I wrote with another, undesired completion? Stop that.
Most frustratingly, I found that autopairs (automatically inserting the
closing pair to an opening character, like ({[<" ) simply did not work
in a way that I felt was intuitive.
These plugins are ultimately what made me want to write this entry, and
this entry is what got me started on this whole website business in the
first place, so getting this right is important to me.
I toyed briefly with the idea of writing snippets (a topic we'll get to in a moment) for each language, but this is essentially writing my own completion suggestions from scratch. This is what we might call a "bad idea".
There are a couple of things we need to get completion working: a completion engine that handles the display and interactivity of a completion menu, and completion sources, comprised of language servers (LSPs, we saw these a little bit with treesitter), snippets, and other bits of logic that tells the completion engine what to populate the menu with.
sequence break!
I had a whole section here about how I was going to reconstruct my setup to be minimal, use as few plugins as I could and write autopairing in luasnip. After doing more searching, it turns out that what I want from pairing behaviour is way overscoped for snippets. My actual options are to write my own plugin, or to do more research and actually read the documentation of the available plugins.
I tried the former. There's an interesting development cycle when writing code to help you write code, where your output is partially contingent on the output of your output. Trying to learn the language I was using to interact with surprisingly complex APIs (treesitter is a miracle), all to develop a tool to help with my development… I lost motivation fairly quickly.
Autopairs does actually seem like the best option for me. The thing that frustrated me about it was a lack of 'tabout' behaviour:
Before:     Input:     After:
(|)         <Tab>      ()|
Implementing this in lua was way above my confidence with the language, needing some way of marking locations (either writing my own or using a the treesitter API) and moving the cursor to them. Writing my own plugin would also mean either: implementing autopairing behaviour (a pretty big project), or writing my plugin as an extension to an existing autopair plugin and exclusively handles the tabout behaviour, requiring fully understanding how the autopairs plugin works under the hood. Luckily, someone has already written a this tabout plugin – called tabout.nvim, funnily enough – so we'll use that when we get there.
While this is an annoying realisation to make this deep into the project, I think it is a perfect example of why documentation should one thousand percent be the first point of call whenever you're having issues with a program. Regardless, I still think re-writing the config is worth it for the learning experience #teachablemoment. Continuing on…
lsp management
We'll set LSP up first, because the package manager, Mason, we will use needs to be loaded before its dependencies (ie. the rest of our completion setup). Language servers can be installed through CLI tools like npm, but I prefer a dedicated interface that can be used within NeoVim (hence Mason).
We first need to add the core LSP functionality to nvim, as it's not
installed by default, and then we can load Mason and its bridge plugin
to nvim. In lazy.lua:
-- lsp
  {
    'neovim/nvim-lspconfig', -- core lsp functionality
    dependencies = {
      'williamboman/mason.nvim', -- lsp package manager
      'williamboman/mason-lspconfig.nvim', -- bridge between mason and lspconfig
    },
  }
And then we can make the lsp.lua file, populate it, and require it:
require('mason').setup()
require('mason-lspconfig').setup()

-- setup all installed language servers

local lspconfig = require('lspconfig')

-- we need this for the html lsp. attention seeker.
local capabilities = vim.lsp.protocol.make_client_capabilities()
capabilities.textDocument.completion.completionItem.snippetSupport = true

lspconfig.lua_ls.setup {
  settings = {
    Lua = {
      diagnostics = {
        globals = { 'vim' }
      }
    }
  }
}

lspconfig.rust_analyzer.setup {}

lspconfig.html.setup {
  capabilities = capabilities
}

lspconfig.texlab.setup {}
We install any new LSPs by running :Mason and installing them from
the TUI, and then setting them up in lsp.lua as we need them. Some
have special requirements, like html needing the capabilities local
variable, but most can be set up with
lspconfig.<lsp_name>.setup {}. Use the lspconfig
documentation to check!
We can't really verify these are working until we have a completion engine, so let's get that running.
completion engine
I've chosen to use nvim-cmp for the completion plugin. It has a good rep, is quick, provides a decent amount of control over which suggestions you want to be shown, and is written in Lua like rest of our config.
We can import and require nvim-cmp and its dependencies as usual in
lazy.lua:
-- completion
{
    'hrsh7th/nvim-cmp', -- completion engine
        dependencies = {
            'hrsh7th/cmp-nvim-lsp', -- lsp source
                'hrsh7th/cmp-buffer', -- buffer completions
                'hrsh7th/cmp-path', -- file path completions
                'saadparwaiz1/cmp_luasnip', -- snippet completions (luasnip)
        },
}
Each of the dependencies is a bridge for each of the completion sources I use.
lsp gives us language specific suggestions.
buffer draws from anything already in the current buffer, which can be annoying on large
files but is handy when writing prose where topical words crop up a lot (e.g. "heteroscedasticity").
path gives path suggestions from the local filetree.
Snippets are my favourite; they are code fragments that can automatically insert structures instead of just text, allowing you to define line breaks, paramaters and, dynamic cursor locations that can be jumped between. These can be phenomenally powerful, allowing shortcuts for common boilerplate structures in just a couple of keypresses. I'll go over setting up a snippet plugin, but might give writing them the deserved attention in a separate post!
We also need to construct the cmp.lua to configure the plugin. This
file has some fairly complex keybinds that use fallback() functions to
check a list of different potential key actions in order of priority.
These are important for tabout behaviour, which we'll set up later. The
big idea, though, is that fallback tells a key to enact its default
action.
local cmp = require('cmp')
local luasnip = require('luasnip')

cmp.setup {

    -- allows completion engine to expand snippets from luasnip syntax
    snippet = {
        expand = function(args)
            luasnip.lsp_expand(args.body)
        end,
    },

    mapping = cmp.mapping.preset.insert {

      -- C-CR will always expand a completion, even without selection

      ['<C-CR>'] = cmp.mapping.confirm {
        behavior = cmp.ConfirmBehavior.Replace,
        select = true,
      },

      -- CR will expand a selected completion

      ['<CR>'] = cmp.mapping(function (fallback)
        if cmp.visible() and cmp.get_active_entry() then
          cmp.confirm({
            behavior = cmp.ConfirmBehavior.Replace,
            select = false
          })
         else
           fallback()
        end
      end),

      -- tab will expand a selected completion if there is one
      -- else, it will jump forward in a snippet
      -- else, it will fallback

      ['<Tab>'] = function(fallback)
        if cmp.visible() and cmp.get_active_entry() then
          cmp.confirm({
            behavior = cmp.ConfirmBehavior.Replace,
            select = false
          })
         elseif luasnip.expand_or_locally_jumpable() then
           luasnip.expand_or_jump()
         else
           fallback()
        end
      end,

      -- shift tab will jump back through a snippet
      -- else, will fallback

      ['<S-Tab>'] = function(fallback)
        if luasnip.locally_jumpable(-1) then
          luasnip.jump(-1)
       else
          fallback()
        end
      end,

      -- C-j navigates down in cmp menu

      ['<C-j>'] = cmp.mapping(function (fallback)
        if cmp.visible() then
          cmp.select_next_item()
        else
          fallback()
        end
      end),

      -- C-k navigates up in cmp menu

      ['<C-k>'] = cmp.mapping(function (fallback)
        if cmp.visible() then
          cmp.select_prev_item()
        else
          fallback()
        end
      end),

    },

    sources = cmp.config.sources {
      { name = 'nvim_lsp' }, -- lsp suggestions. this is the big one
      { name = 'luasnip' }, -- luasnip snippet suggestions
      { name = 'buffer' }, -- suggestions based on content in the active buffer. comment this out to remove plaintext suggestions
      { name = 'path' }, -- suggestions when typing paths
    },
}
This file defines the keymap behaviours for interacting with the completion menu, and establishes snippet behaviour. At the bottom of this file is where we actually 'pipe' each of our completion sources into the completion engine, meaning the completion menu should now be populated:
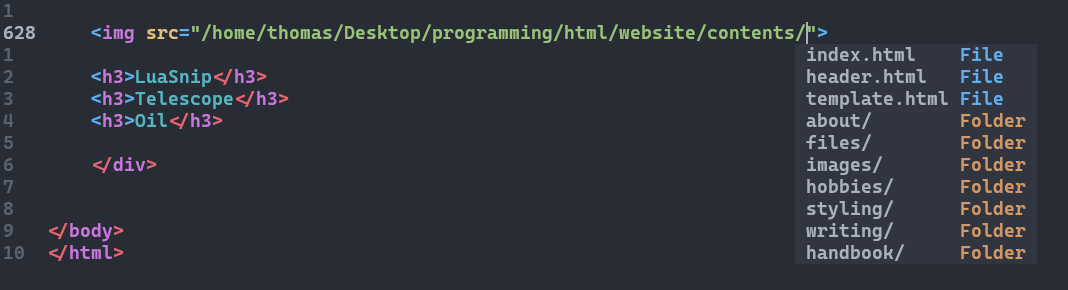
Very nice!
luasnip
Snippet configuration is structured similarly to completion in that we need a snippet engine and snippet sources. The engine itself just provides the framework for snippet functionality, which we then populate with snippet code that can be interpreted.
There are two under-the-hood use cases for snippet execution. When used in conjunction with completion, the completion engine sees the snippet engine as one of its sources – a big list of things the user might be typing. If a snippet is selected on the completion menu, the completion engine cedes responsibility to the snippet engine to interpret and run the snippet. The other use case is autosnippets, which execute automatically if their trigger is input. In this case, the snippet engine is simply watching user input in the same way as the completion engine, but acts automatically instead of presenting the user with options.
First, though, we need a snippet engine! I use
LuaSnip
because it has pretty good documentation (especially third party), does
exactly what we need, and is (say it with me) written in Lua. We install
it in lazy.lua:
{
    'L3MON4D3/LuaSnip'
},
For this plugin, we're going to use a modular configuration that discriminates by filetype. This is really nice for avoiding bloat and keeping a tight, well defined set of just the snippets you need. The setup will look something like this:
core/
  |― lazy.lua
  |― luasnip.lua
  |― luasnip/
        |― all.lua
        |― rs.lua
        |― tex.lua
        |― html.lua
To start we just need luasnip.lua, the luasnip/ directory, and the
all.lua snippets file. Configuration for LuaSnip is a bit different,
in that most of our config requires the API as a local variable ls
that we call functions from. Besides that, we add the usual preamble and
set some uptions in luasnip.lua:
local ls = require("luasnip")

ls.config.set_config({
    enable_autosnippets = true
})
We also define the keymaps for interacting with snippets:
-- tab if we can activate or jump around a snippet, but normal tab behaviour otherwise
vim.keymap.set({"i", "s"}, "", function()
  if ls.expand_or_jumpable() then
    ls.expand_or_jump()
  else vim.api.nvim_feedkeys(vim.api.nvim_replace_termcodes("", true, false, true), "n", false)
  end
end, {silent = true})

-- shift tab to navigate backwards
vim.keymap.set({"i", "s"}, "", function() ls.jump(-1) end, {silent = true})
This is a bit interesting, as there are a few different setups we could
use depending on whether or not we want to use the same key for
expansion (activating a snippet) and jumping (navigating cursor
positions within snippets).
I like to use tab for both expansion and
jumping, as this means that snippet expansion takes priority over cmp.
This is why we check if there is a snippet that can either be activated
(expanded) or navigated within (jumped) with the
expand_or_jumpable() check.
If it returns true, then we enact it with expand_or_jump (expanding is prioritised, so that snippets can be activated inside of other snippets).
The else check ensures that if
there is no snippet interaction available, then tab should just add
whitespace as normal (that line is courtesy of u/MunifTanjim).
As an example, say that both myself and the rust_analyzer LSP have
defined a snippet for fn that inserts a template for a function
definition. The keystrokes for activating my snippet would be
fn<Tab>, while the LSP snippet would be fn<C-j><Tab>. It's
not a huge difference (which is a good thing) but it's still easier to
use something that I have defined than what the LSP provides, which
addresses the issue I had with third party completion not behaving in
the way I expected or wanted it to.
This isn't really the expected or intuitive way of setting this up, though. What would be more usual is to let cmp handle all of the snippet activation, and just define jumping within snippets in the LuaSnip config. This might look something like this:
-- luasnip.lua

-- tab to jump forward
vim.keymap.set({"i", "s"}, "<Tab>", function() ls.jump(1) end, {silent = true})
-- shift tab to jump backwards
vim.keymap.set({"i", "s"}, "<S-Tab>", function() ls.jump(-1) end, {silent = true})

-- cmp.lua

-- tab completes selected suggestion
['<Tab>'] = cmp.mapping.confirm {
  behavior = cmp.ConfirmBehavior.Replace,
  select = true, -- change to true for single-press completion
},
This would mean that all user-defined snippets are treated as a cmp source and just show up on the completion menu when their trigger is typed. It's worth spending some time thinking about which keybinds and behaviours make sense to you individually. (Regardless of which is used, autosnippets will always execute automatically if they're triggered).
We can then tell LuaSnip where to look for snippets by calling a load
function in luasnip.lua:
require('luasnip.loaders.from_lua').lazy_load({paths = '~/.config/nvim/lua/core/luasnip/'})
I've used .lazy_load, which will only load files as needed by
filetype. This is how we get filetype-filtered snippets. The other
option is .load, which will just load all the snippet files regardless
of filetype.
To test our setup we can define some simple snippets and try them out in
suffixed files. To define a snippet in one of the luasnip/ files, we
need to import the luasnip API and some functions from it. The most
basic functions are s and t for snippet creation and text:
-- all.lua
local ls = require('luasnip')

local s = ls.snippet -- make a snippet
local t = ls.text_node -- write text
I'm planning on writing another entry to explain snippet syntax where I'll try to fully understand and document how they work, but for now we'll just make the most basic snippet possible:
-- all.lua
return {
    s("hi", t("Hello world!")),
}
With the return statement we can see that we're just passing a lua
table of snippets to luasnip when it calls the file. Each snippet is
brought into scope with s() which is a function that we've passed two
arguments. The first, "hi" is the trigger for the snippet; what
the user has to type for it to expand. This argument can be replaced
with a table of options, but for a snippet this simple we can just pass
a string. The second argument is another function, t() which defines a
"text node" – when by itself this just defines what the snippet
should expand to. We pass a string to this function, "Hello world!",
so when we put it all together we have a snippet that is triggered on
hi and expands to Hello world!
Trigger:        Input:        Result:
hi              <Tab>         Hello world!
These are a bit tricky to demonstrate without using it yourself or seeing a video, so this will have to do I'm afraid.
We can also define our filetype-specific snippets, for example in
html.lua:
-- html.lua
local ls = require('luasnip')

local s = ls.snippet
local t = ls.text_node

return {

    s("ht", t("a html file")),

    s("hi", t("Hello html!"))

}
These will only be loaded by luasnip for files with the correct
extension, .html in this case (they're also loaded on buffer
instantiation, so this will still work properly if you navigate to a
different filetype within neovim!)
Both of these snippets are the same as the previous example, just with
different text. Because of the filetype filtering, ht will only prompt
a snippet expansion in html files. We've also overridden the hi
snippet from all.lua. In a html file both of these will be shown as
options, but the filetype specific snippet will be given higher priority
by default.
That's pretty much it as far as basic snippet setup, but they can do a lot more than just expand text! I'll link to the snippets page here when I get around to writing it. I was going to use snippets for autopairing, but the behaviour I want was just too complex for them so I've reverted to using dedicated plugins for them, which we'll do now!
autopairs
oil
closing remarks
This took a lot of time to do but I think it was very much worth it. I have a much better understanding of neovim, lua, and my configuration, and have far more confidence to tweak my dotfiles as I see fit. Getting things like autopairing / tabout working properly was also really interesting, and it's satisfying to have my entire development pipeline work in a way that I find intuitive.
If there happens to be anyone following this for their own config, please note that writing this entry was not a smooth or continuous process. I was troubleshooting as I went and jumping back and forth between different sections to make sure all of the plugins worked nicely together. I'm certain there will be things I've missed or gotten wrong or forgotten to update after tweaking my files. For the most accurate and up-to-date version of this config, see my current nvim dotfiles directly on GitHub.
I'm also not planning on updating this page as I continue to modify my config; this was just a from-nothing to functional IDE with all my preferences as a way of documenting the process and forcing myself to understand the things I was doing.
Thank you for reading!